## PLEASE READ## This tutorial presents a method to secure a top line to rope work to do suspensions with. DO NOT do any kind of suspension work if you have never done so before and are not working with qualified instructors to learn how to do it safely and properly. Suspensions are seriously risky business and you need to work with people who can teach you the risks. It needs to be done IN PERSON with someone who knows what they are doing. ##
Having said that, this is a good tie to learn and practice with in preparation for learning how to suspend. Please learn from local experts before attempting any suspensions though, for your safety and more importantly for the safety of your bottom.
The reason the Bondage Hanger is presented here is to show how to rig the Basket Weave Hip Harness.
 |
| Start by tying the Basket Weave Hip Harness |
 |
| Bring the bight of your rope under the lower band on the outside of the harness. |
 |
| Bring the bight under the upper band but keep some slack in it so that you have a "U" shape of rope. |
 |
| Bring the bight over the "weave" leaving another "U" of rope the same size as the original. |
 |
| Bring the bight down under the lower band of the harness then under the upper band but leave another "U" of rope between the two bands. ## Note that while you are doing this you will have had to feed some rope through the bands that are already in place## |
 |
| Adjust the three "U"s so that they are all the same size and are in parallel with one another. Then bring your bight (under the red circle) down next to them. |
 |
| This is how it should look from the side. |
 |
| Form a loop with the tails (seen here with the red arrows). Pull the bight through the loop (green arrow). |
 |
| Pass the bight back underneath all of the bands of the hanger then back up through the loop formed by the standing line. |
 |
| Pull the loop tight leaving the bight free (the bight is under the red circle) ##Please note: this is a Boola Boola single column tie. Any forward tension single column tie can be used to finish a bondage hanger- the Boola Boola, Wyk'd Dave Wyk'd Fast Bowline, Somerville Bowline or Burlington Bowline all work well. The Boola Boola was done to show it quickly## |
 |
| This step is CRITICAL!!! Take the tails of your rope and pull it through the bight. This secures the tie so it cannot come undone. If you are to have a person suspended you should always do this to top lines to help eliminate risk!!!! |
 |
| This illustrates the tails pulled through the bight. |
 |
| This is the really fun part with the bondage hanger on the Basket Weave Hip Harness- it works like a rope holster! Take the tails and loop them in your hand so that they are parallel to one another. |
 |
| Fold the loop in half as shown. |
 |
| Fold the loop in half again. |
 |
| Stick that bundle of rope into the middle of the bondage hanger. |
 |
| If you have done it correctly then it will look like this. Now check out the cool video of what you can do with it when you have put it in the "rope holster". Very fun! |
 |
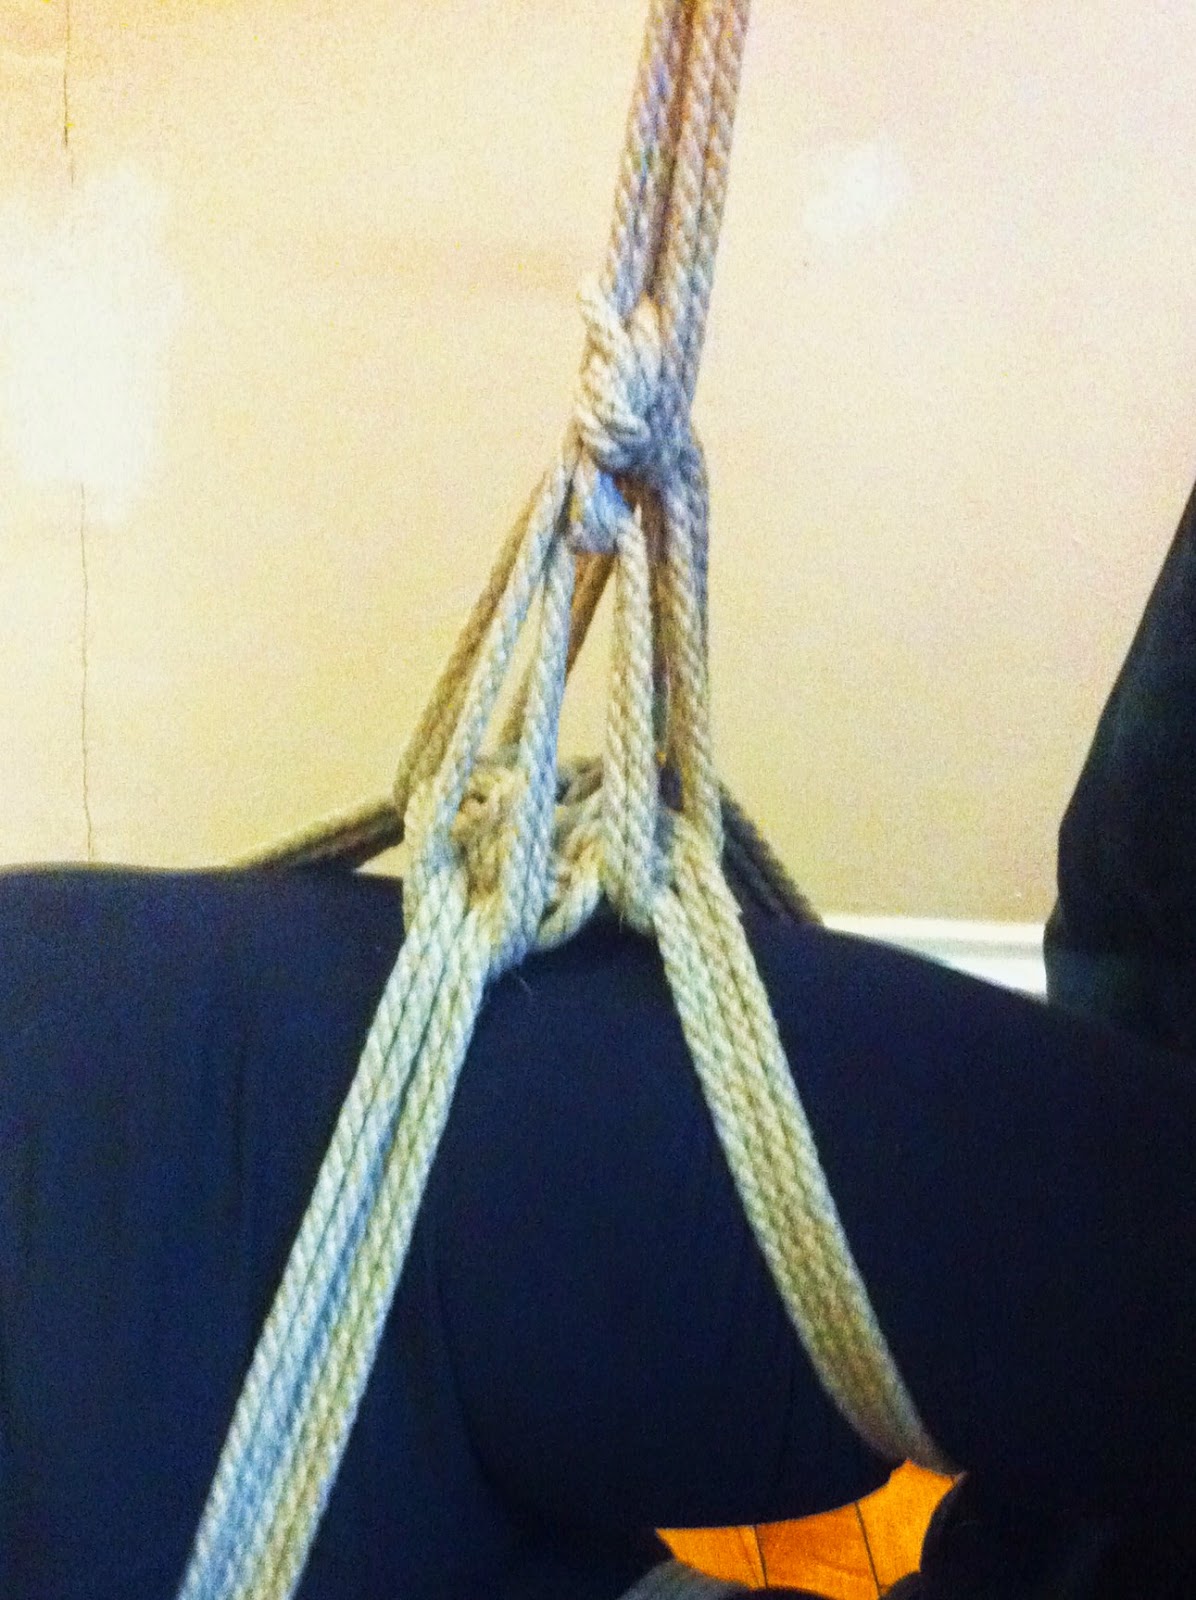
| This is what the finished bondage hanger looks under tension supporting weight. ## Again, do not use this to suspend unless you have been properly instructed## |
No comments:
Post a Comment